"OOH! I have tons of quotes I could put on mugs! Birthday presents for everyone! Christmas! With biscotti! YAY!
...
But who wants a mug with my chicken scratch on it?
(sigh of resignation)
I suppose I could pay $29.95 for someone on Etsy to custom make me one..."
So, days, weeks, months went by, and one day, it hit me! So, here's my tutorial for the less-than-cutesy among us if you want to design your own mug. Just in time for Teacher Appreciation Week! (I'm going to just apologize up front for the poor quality of the photos. I'll learn how to do better, I really will.)
Materials needed:
- Oven-safe mug (check thrift or dollar stores)
- Sharpie or Sharpie Paint Pen (I used the regular Sharpie, but I think the process is the same, check the paint pen packaging if you're unsure.)
- tape
- Computer with internet access and word processing software
- Printer and paper
1.Obviously, you have to choose your quote first.
If you know the gift-recipient's favorite book or author, you can go to www.goodreads.com and look for quotes. (Log in. Click the drop-down menu next to "Explore" and choose "Quotes".) For my sister's birthday, I chose the following quote: "Words are our most inexhaustible source of magic. - Albus Dumbledore" My sister is a writer, and a huge Harry Potter fan, so I knew this quote was perfect for her. [Technically speaking, the author of the book is who the quote should be attributed to, no matter what character says it. However, I
Don't forget to consider song lyrics, plays/movies, and poetry!
Some good quotes for teachers are:
A teacher affects eternity; he can never tell where his influence stops. - Henry Adams
The best teachers teach from the heart, not from the book. - Unknown {Can I change "book" to "test"??}
I am indebted to my father for living, but to my teacher for living well - Alexander the Great
It's easy to make a buck. It's a lot tougher to make a difference. - Tom Brokaw
They will never forget how you made them feel. - Maya Angelou
Teaching might even be the greatest of the arts, since the medium is the human mind and spirit. - John SteinbeckDisclaimer: The only one of these I fact-checked is the Angelou quote.
Ok, so that should have been the easy part.
2. Find a font that you like and download it. I usually use http://www.1001freefonts.com/ . It's got tons of fonts, and, they're all free (they named it really well, don't you think?). Follow the directions on the site to install it on your computer. This link has links to directions for different types of computers.
3. Once you've chosen and installed, open your word processing software and write the quote in the font.
4. Then, play with it a bit. Make important words larger than less-important words. You also have the option to print out the different words separately and arrange them in that "subway" style, or to simply print them in a line. You can even use different fonts together like this style, or just change the font sizes like here. Look around on the internet to see different displays of quotations. BUT, this is important: if a product is for sale, do not simply rip it off. Use it for inspiration, but don't steal someone else's intellectual property.
5. Print it out, and place it on the cup to make sure your size and placement are good. Use regular, old printer paper, or tracing paper if you have it. Do not use thick paper! If you're like me, you'll have to change things and print again a few times to get it the way you want it
 6. Once you're certain you have the words where you want them, tape them onto the mug. You may choose to cut the paper into small strips and do one part at a time, so that the paper fits onto the curve of the mug. Again, play with it until you have it the way you want it.
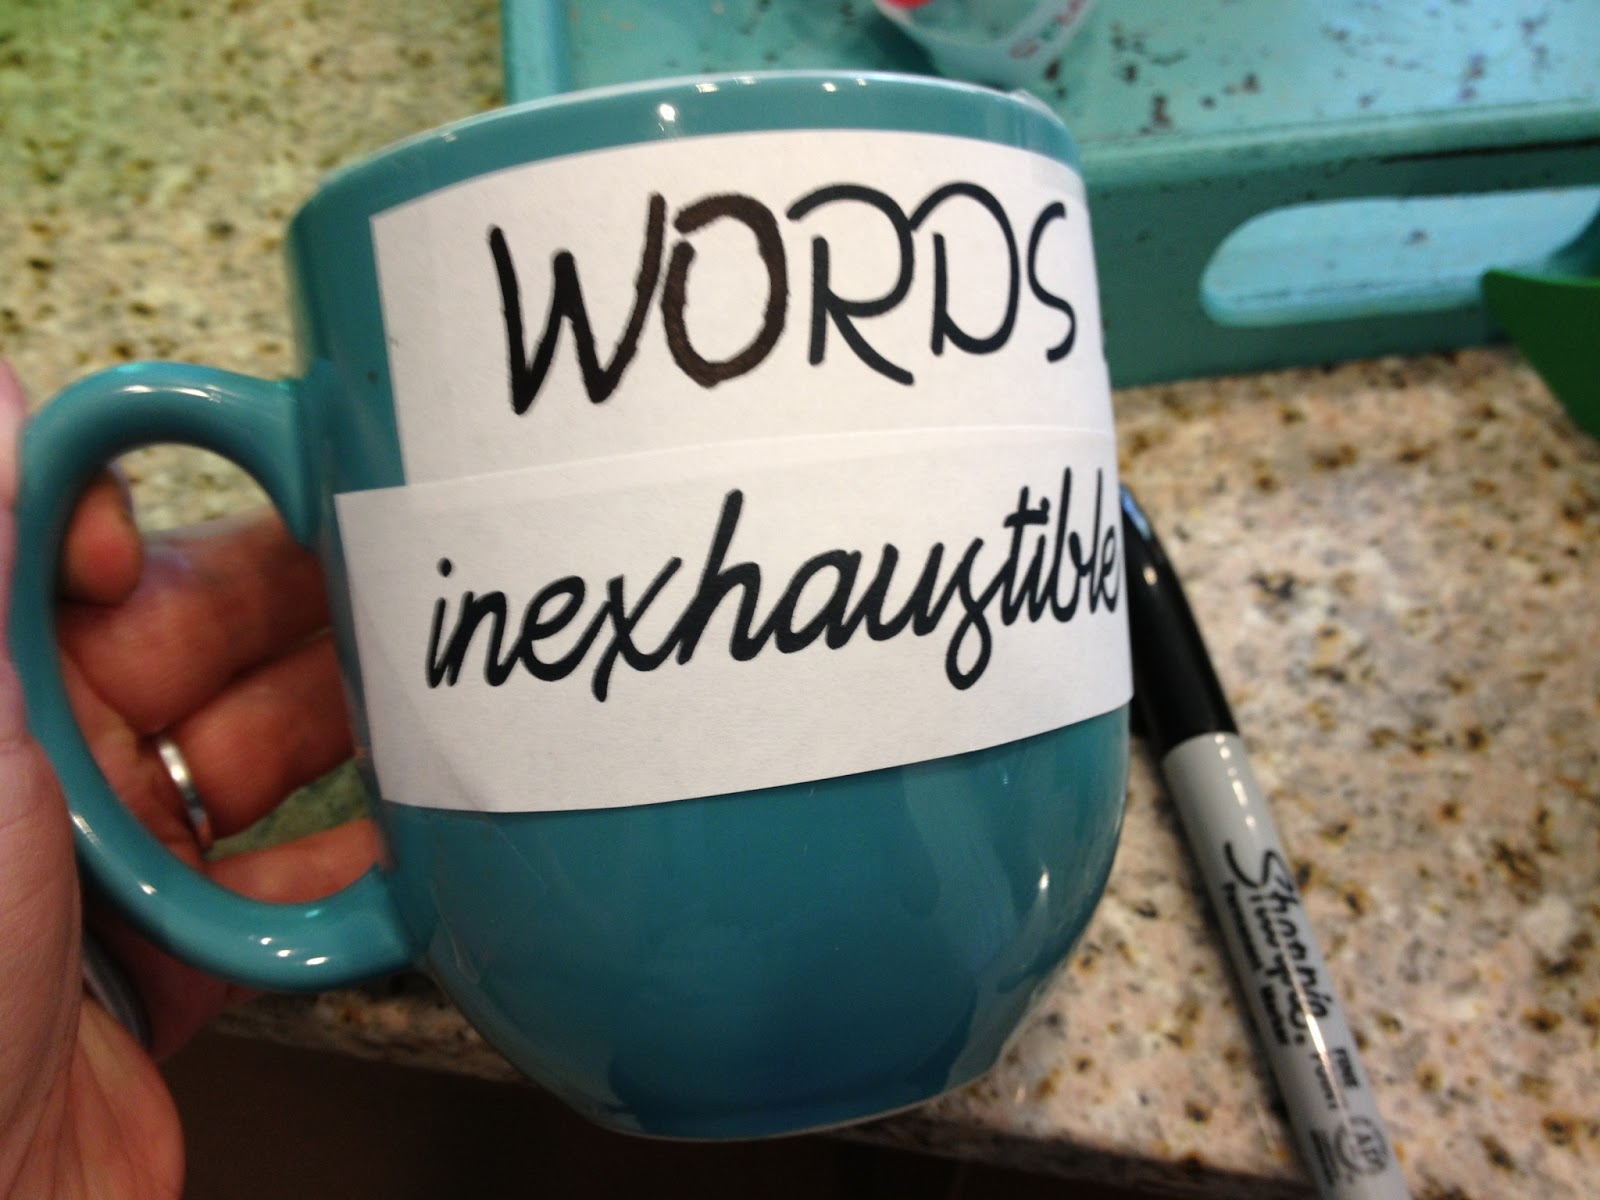
7. Use your sharpie to carefully color over the words. This should allow the sharpie to bleed through, faintly, onto the mug. In the picture above, I have just started to color the words.
8. Carefully remove the paper and use the outline to fill in the words. Only peel off one section at a time, or tape a new, clean piece of paper over any words that your hand might touch while tracing. This will keep it from smudging. I left the top paper on while I did the bottom. Then, I retaped the bottom to trace the top. Set the paper you removed in front of you to refer to as you fill in.
 |
| As you can see, you only have an outline, but it should be enough to fill in without having to truly freehand the writing. |
 |
| After tracing |
9. Once you have all your tracing done, you can erase any mistakes with a cotton swab and rubbing alcohol.
10. This step is a little different than some of the Pinterest tutorials. Set the mug in the oven BEFORE turning it on, and heat to 350*. When the oven is hot, let it "cook" for 30 minutes, and then turn off the oven, leaving the mug in there. Let it cool down in the oven. Let sit for 24 hours before washing. Gently handwash only.
I gave my sister her present in December, and she says it still looks great! If you have any other helpful hints for this project, leave it in the comments!


2 comments:
Love it! Easy, fun, creative, and thoughtful!
I've only used ceramic pens from the craft store, but I love that you can choose a font if you want instead of just handwriting. Nice!
Post a Comment